この記事では、WindowsイベントログをEasyBlocks Syslogに転送する方法について紹介していきます!
EasyBlocks Syslogを利用するにあたって…
Windows ServerのログもSyslog収集したい…
WindowsイベントログをEasyBlocks Syslogで一元管理したい…
という場合があります。
Windows Serverのログは「イベント・ログ形式」になっており、「Syslog形式」のログを収集・保存する EasyBlocks SyslogにはSyslog転送することができません。
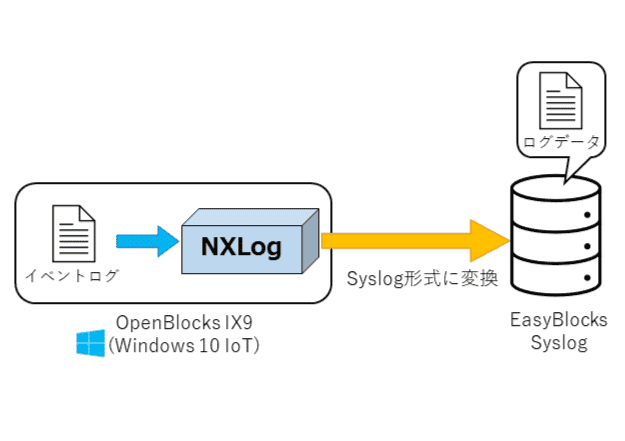
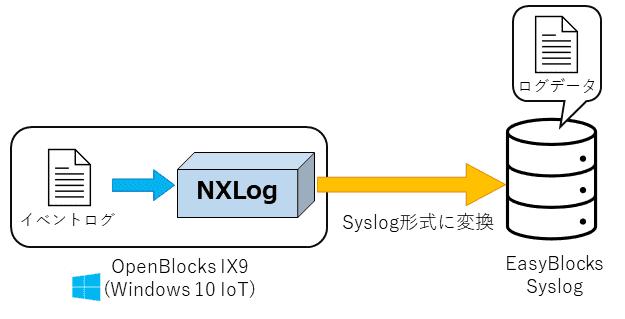
しかし、NXLogを利用することにより、このイベントログを EasyBlocks SyslogにSyslog転送できるようになります!
☟本ブログの改訂版はコチラから☟
はじめに
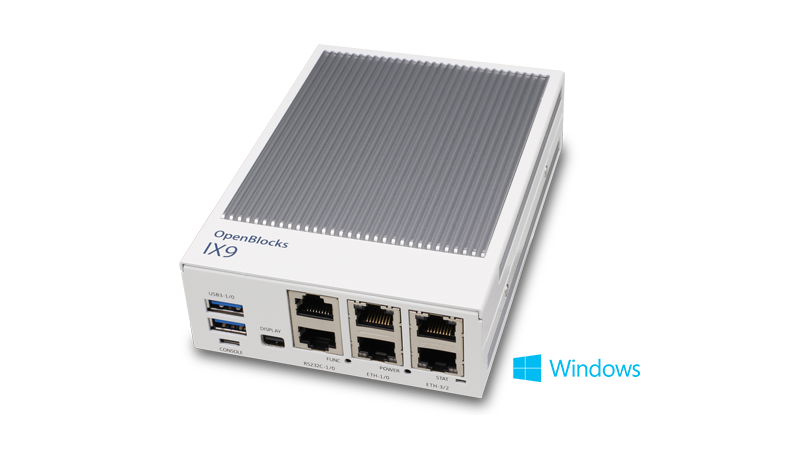
今回は Windows Serverとして、OpenBlocks IX9(Windows 10 IoT)を使用します。
この OpenBlocks IX9には、NXLog Community Editionをダウンロード、インストールをします。
NXLog Community Editionとは、ヨーロッパのNXLog社が開発しているオープンソースの Windowsログ収集ツールです。このNXLogは WindowsイベントログをSyslog形式に変換することができるため、Windowsのログを EasyBlocks SyslogにSyslog転送できるようになります。
☟NXLogのダウンロードはコチラのURLから☟

製品環境
EasyBlocks Syslog :ソフトバージョン 1.1.7(初期設定のみ)
OpenBlocks IX9(Windows 10 IoT)
NXLog Community Edition:Windows版
OpenBlocks IX9へ NXLog Community Editionをインストールします。
EasyBlocks Syslogと OpenBlocks IX9は、共通のネットワークに LAN接続しています。
参考サイト
【Windows】イベントログをLinuxに転送する #Linux – Qiita
DigiLoog » NXLogでWindowsイベントログをsyslog転送してみた (ns-lab.org)
Windows/Binary/NXLog – nowsky system-lab memo (ns-lab.org)
Syslog転送する手順
NXLogの設定ファイル編集
インストールが完了した後、設定ファイルを編集します。
C:\Program Files\nxlog\conf\nxlog.conf
ファイル内容を以下のように変更します。
## This is a sample configuration file. See the nxlog reference manual about the
## configuration options. It should be installed locally and is also available
## online at http://nxlog.org/docs/
## Please set the ROOT to the folder your nxlog was installed into,
## otherwise it will not start.

define ROOT C:\Program Files\nxlog
#define ROOT C:\Program Files (x86)\nxlog

Moduledir %ROOT%\modules
CacheDir %ROOT%\data
Pidfile %ROOT%\data\nxlog.pid
SpoolDir %ROOT%\data
LogFile %ROOT%\data\nxlog.log

<Extension syslog>
Module xm_syslog
</Extension>

<Extension charconv>
Module xm_charconv
AutodetectCharsets shift_jis, utf-8
</Extension>

<Extension json>
Module xm_json
</Extension>

<Input msv>
Module im_msvistalog
Query <QueryList>\
<Query Id="0">\
<Select Path="Application">*[System[(Level=1 or Level=2 or Level=3 or Level=4)]]</Select>\
<Select Path="System">*[System[(Level=1 or Level=2 or Level=3 or Level=4)]]</Select>\
<Select Path="Security">*[System[(Level=1 or Level=2 or Level=3 or Level=4)]]</Select>\
</Query>\
</QueryList>
Exec $Hostname = hostname();
Exec $raw_event = "json=" + to_json(); $SyslogFacilityValue = 21;
Exec convert_fields("utf-8", "utf-8");
</Input>

<Processor tra>
Module pm_transformer
OutputFormat syslog_bsd
Exec $Message=(": "+$raw_event);
</Processor>

<Output udp>
Module om_udp
Host xxx.xxx.xxx.xxx
Port 514
</Output>

<Route 1>
Path msv => tra => udp
</Route>
<Input msv>の <Select Path=”Application”>、<Select Path=”System”>、<Select Path=”Security”>では各イベントログの出力とLevelを指定しています。
Level1=CRITICAL、Level2=ERROR、Level3=WARNING、Level4=INFO
<Output udp>の Hostには、EasyBlocks Syslogの IPアドレスを指定します。
Portには、514を指定します。
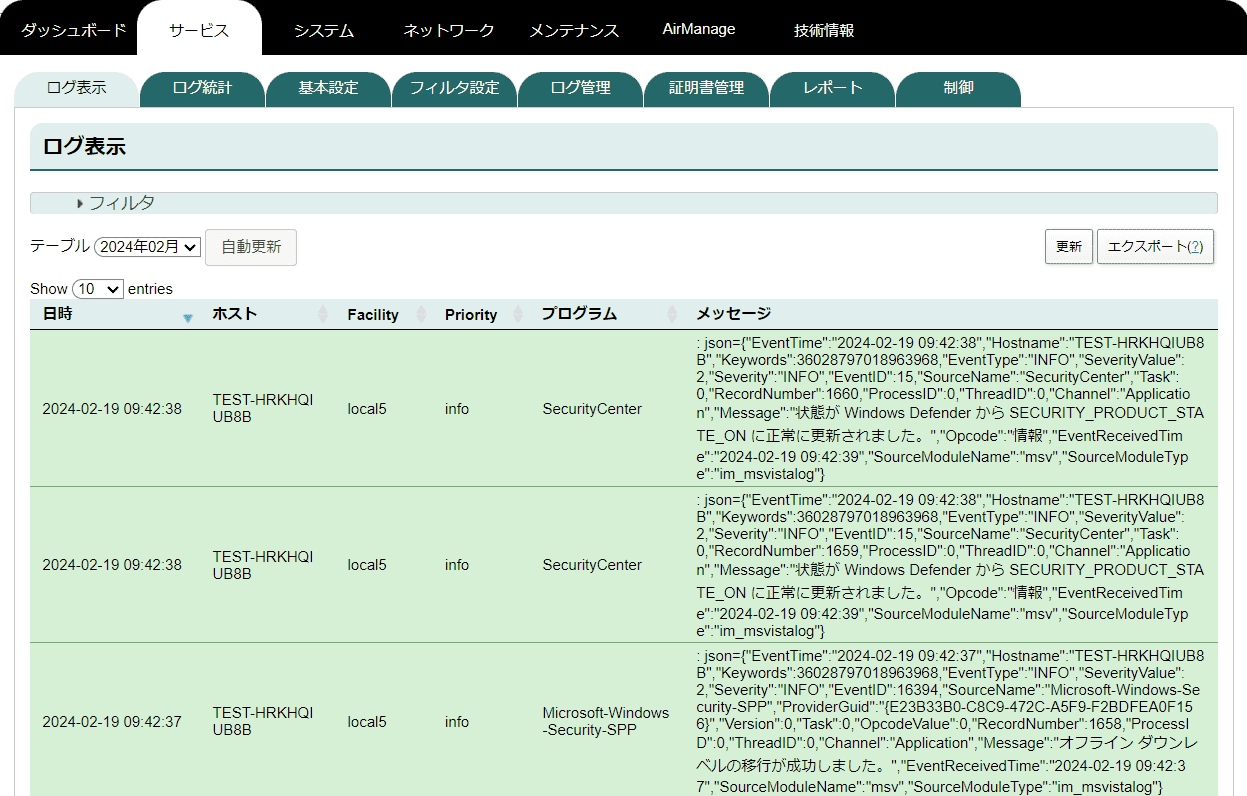
以上でNXLogの設定ファイル編集は完了です。
完了後、EasyBlocks Syslogに画像のようなログが転送されてます。
最後に
今回は、WindowsイベントログをEasyBlocks Syslogに転送する方法について紹介しました。EasyBlocks Syslogを利用している方で「Windows Serverの状況も確認したい!」という場合のご参考になれば幸いです。
また、EasyBlocks Network Reporterにも同様の設定でSyslog転送することができます。
2024年4月23日追記:セキュリティログについて
WindowsのセキュリティログをSyslog転送する際に、
“成功の監査“もしくは”AUDIT SUCCESS“というログを記録したい場合は、
設定ファイルの<Select Path=”Security”>の行を以下のように変更することでSyslog転送されます。
<Select Path="Security">*[System[Provi